This guide provides instructions and solutions for one of the four Vaults on the Shores of Gold Tall Tale in Sea of Thieves. If you haven't begun this Tall Tale or made it to the Shores of Gold, you can find that link to that guide section below. In the list below, you can also find the links to every other guide for this Tall Tale, including the other Vaults and the Hidden Journals.
- Sea of Thieves | Shores of Gold Tall Tale | How to Find the Shores of Gold
- Sea of Thieves | Shores of Gold Tall Tale | North Vault Guide and Solutions
- Sea of Thieves | Shores of Gold Tall Tale | South Vault Guide and Solutions
- Sea of Thieves | Shores of Gold Tall Tale | East Vault Guide and Solutions
- Sea of Thieves | Shores of Gold Tall Tale | How to Find and Defeat the Gold Hoarder
- Sea of Thieves | Shores of Gold Tall Tale | Hidden Journal Locations
We strongly recommend looking for the Hidden Journals on this adventure, as they provide much greater insight into Briggsy, who is what we believe to be the main character in this whole questline. Since you'll be exploring the island for this
Sea of Thieves | Shores of Gold Tall Tale | West Vault Guide & Solution
How to Solve
When you enter the West Vault and look at the alter, you will see an image on there that shows an overhead view of the map. On this map are four different icons that look like buttons on a coat. Each icon will contain one to four dots. Keep track of which icon has how many dots, as this will come into play shortly. If you are struggling to remember where these icons are on the map when you leave the room, you can turn to the page in the Quest Book with Briggsy's crude drawing of the island. The circles with question marks in them are the locations of these icons.
Related: Where to Sell the Reapers Chest in Sea of Thieves - Pro Game Guides
If you go to the locations where the icons would be on the island, you'll find platforms and mechanisms with which you can interact. When you manipulate these mechanisms, you'll find that it reveals a symbol to you. The list below provides images of the mechanisms and a short description of how to see the revealed symbols.
Eastern Mechanism

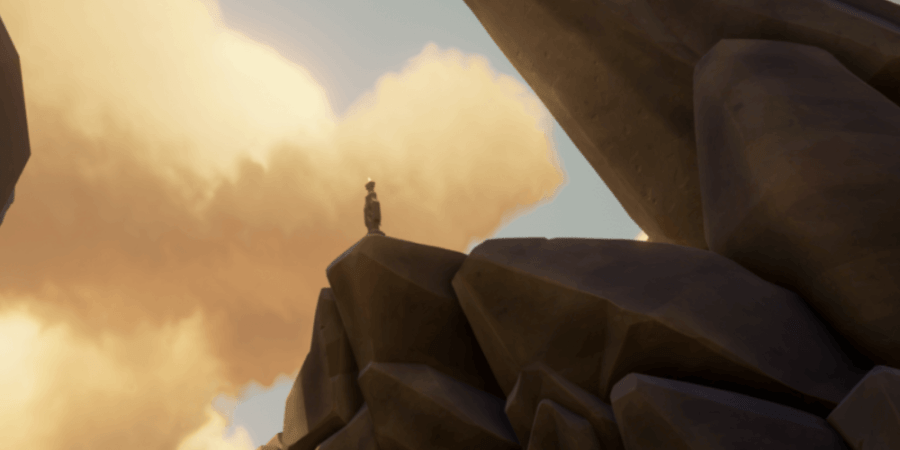
If you walk along the Northeast corner of the island, you'll notice a stone statue sticking up directly off a ledge. Follow the path up to this ledge, and you'll find that it is a platform on which you can stand. When you walk onto it, look to the Southeast. You will see a stone protrude from the water. Make a note of this symbol and where the icon for it is on the Vault's Altar map.
Southern Mechanism

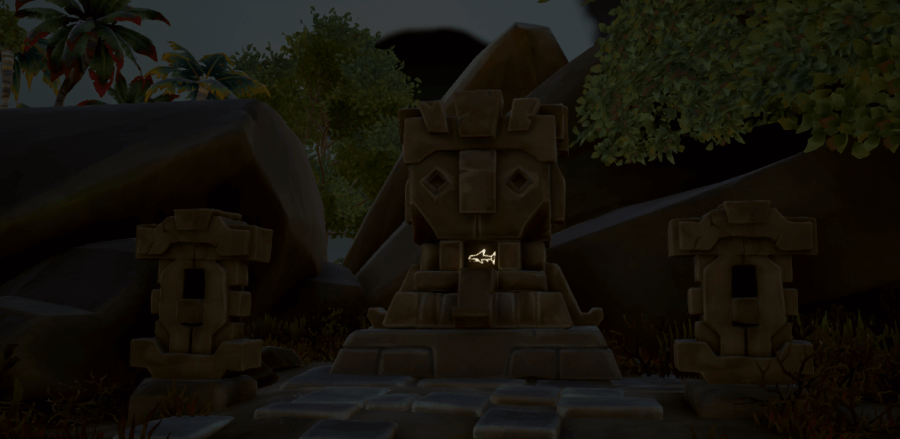
This mechanism is a lever that is at the end of the arm of an ancient statue near Briggsy's derelict sloop. When you pull the lever down, the statue's mouth opens to reveal the symbol behind its jaw. Make a note of this symbol and where the icon for it is on the Vault's Altar map.
Southeastern Mechanism

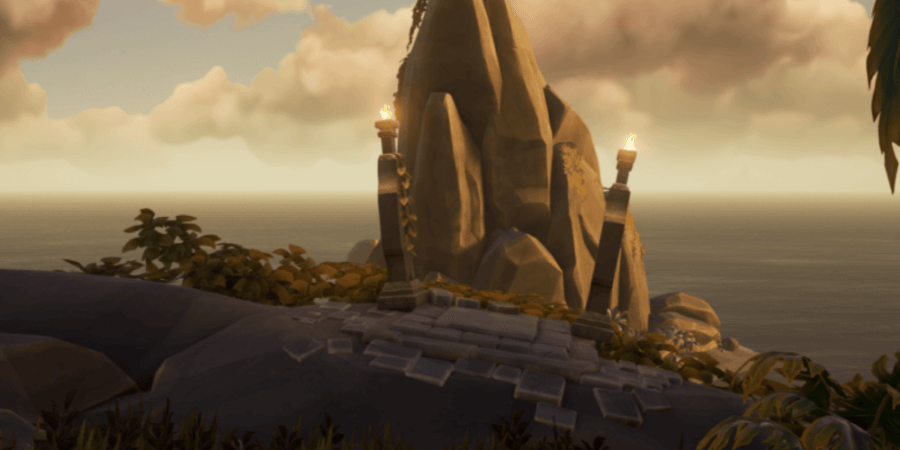
If you walk up the ramp that leads you up the massive rock formation in the center of the island, you will come across this mechanism on your right site. You can also reach it by following the path away from the Compass Room's peninsula. When you stand on this mechanism, it will raise a stone across the water in front of you. This stone gradually goes down as soon as you activate it, so you need to hurry across to see the symbol that is on the other side. Make a note of this symbol and where the icon for it is on the Vault's Altar map.
Northern Mechanism

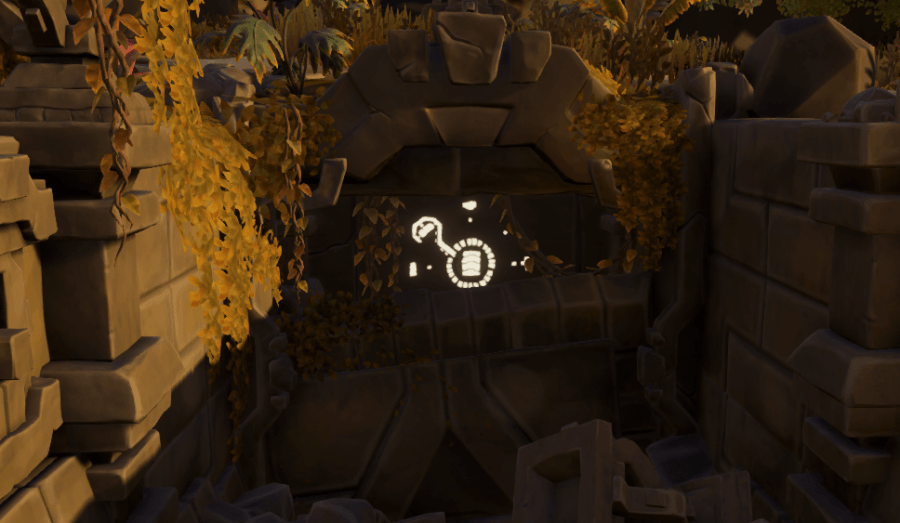
This mechanism is on its own peninsula, north of the two rows of large stone statues. You will see several platforms in a circle, and when you stand on each platform, it raises a stone in the statue in front of you. In the center of this section are steps that lead to the face of a statue below.
At the top of these stairs, you can find a lever. Engage the lever, and a stone will lower at the bottom of the stairs to reveal an image of a hook connecting one of the spots surrounding the center. Go to the statue that this image suggests is hooked, and that will be the symbol you need in the vault. Make a note of this symbol and where the icon for it is on the Vault's Altar map.
The Symbol Order
Technically speaking, there are only 16 possible combinations for this Vault, so you could actually solve it faster than it would to explore the island and get the symbols. If you haven't already explored the island looking for them, you can opt for this method instead. Since there is no set pattern in which the icons will be numbered, unfortunately, there is no guaranteed answer for this vault.
Related: How to Get An Ashen Key in Sea of Thieves - Pro Game Guides
Assuming you have all the symbols, you can now return to West Vault to enter the solution. Remember the icons on the overhead view in the Altar? Well, you now need to turn the pillars to match the icons in ascending order. That is to say — the symbol at the icon with one dot is the symbol you need to have on the pillar to the left. The symbol at the icon with two dots is the symbol you need on the second pillar from the left.
Follow this pattern with the third and fourth pillars, and then press the button in the middle of the Altar. The crevice behind the wall will be revealed, and you'll have access to a shiny new West Medallion!
Return the Medallion
Take the Medallion to the Compass Room on the peninsula just south of the North Vault's peninsula. It will automatically fit in the slot on the left side.
What's Next
There are other vaults to solve! The following links will provide you with the guides and solutions for the other three vaults: North, South, and East. Before you enter the Gold Hoarder's chamber, we recommend you start searching for the Hidden Journals! If you have found all four medallions, proceed to the guide on How to Find and Defeat the Gold Hoarder!
Want to start a Raid Event? Use our guide on How to Get a Ritual Skull!
