Destiny 2 has become one of the largest MMOs on the market, and the release of their newest expansion only helped to bring more players online. With so many players returning to the game after a while, many fans have found they no longer like the name they chose. Here is how you can change your Bungie ID for Destiny 2.
How to change your Destiny 2 name
Whether you are just sick of the name you've had for the past few years or you are a console player who wants their in-game name to be different from their Gamertag, Bungie has finally added the ability to change your Bungie ID. See the steps below for changing your name.
Related: Vow of the Disciple Loot Table: Destiny 2 Raid Rewards
- Head to Bungie.net and sign in to your account
- Once signed in navigate to your profile image in the top right corner to open a drop down menu.
- In this menu, select the Settings option.

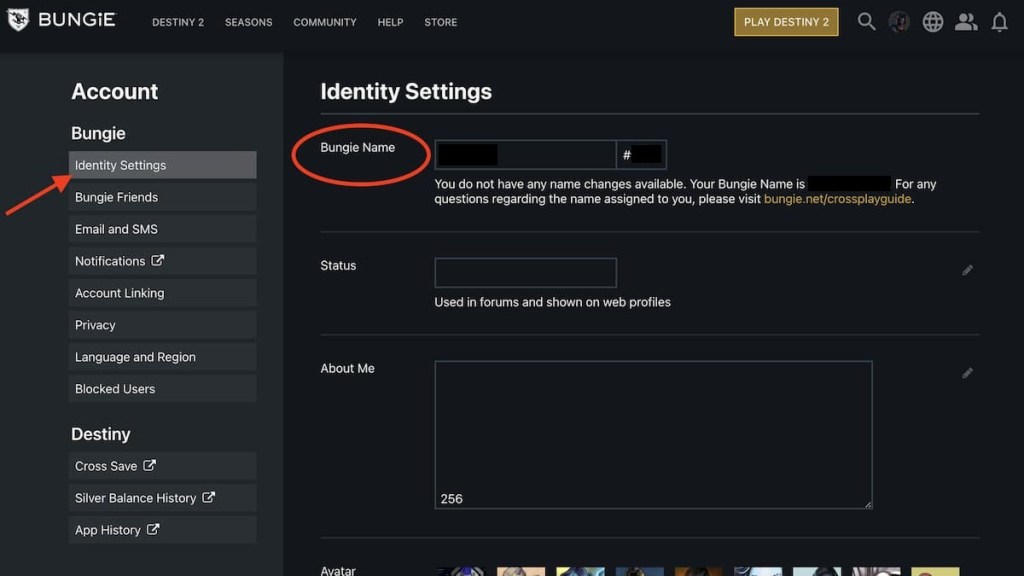
- This will bring you to your Account Settings. Now make sure you are on the Identity Settings tab.
- Lastly, you will see your Bungie ID at the top of this page. Here you will be able to change your name one time to something else. Once you change your name once, you will be told that you have no name changes available. (Note: My name has been blacked out for privacy)

So there you have it, that is how to change your Bungie ID for Destiny 2. Remember that this is a one-time-only change, and Bungie has no plans currently to allow players another name change, so make this one count.
For more on Destiny, check out How to get Collective Obligation in Destiny 2 right here on Pro Game Guides.
