
If you're looking to join all the factions in Starfield, then you won't want to miss the Crimson Fleet. "Absolute Power" is a mission you'll encounter as you go undercover in the Crimson Fleet; you'll need to be extra stealthy to get through it without raising any alarms or fighting an entire armada. We have a step-by-step guide to help you navigate it a bit easier!
Crimson Fleet Absolute Power Walkthrough in Starfield
This first step in the quest is to fly to the pleasure city of Neon, located within the Volii system on the planet Volii Alpha. There, you'll need to meet with Estelle Vincent at Madame Sauvage's, who is an informant for the Crimson Fleet.
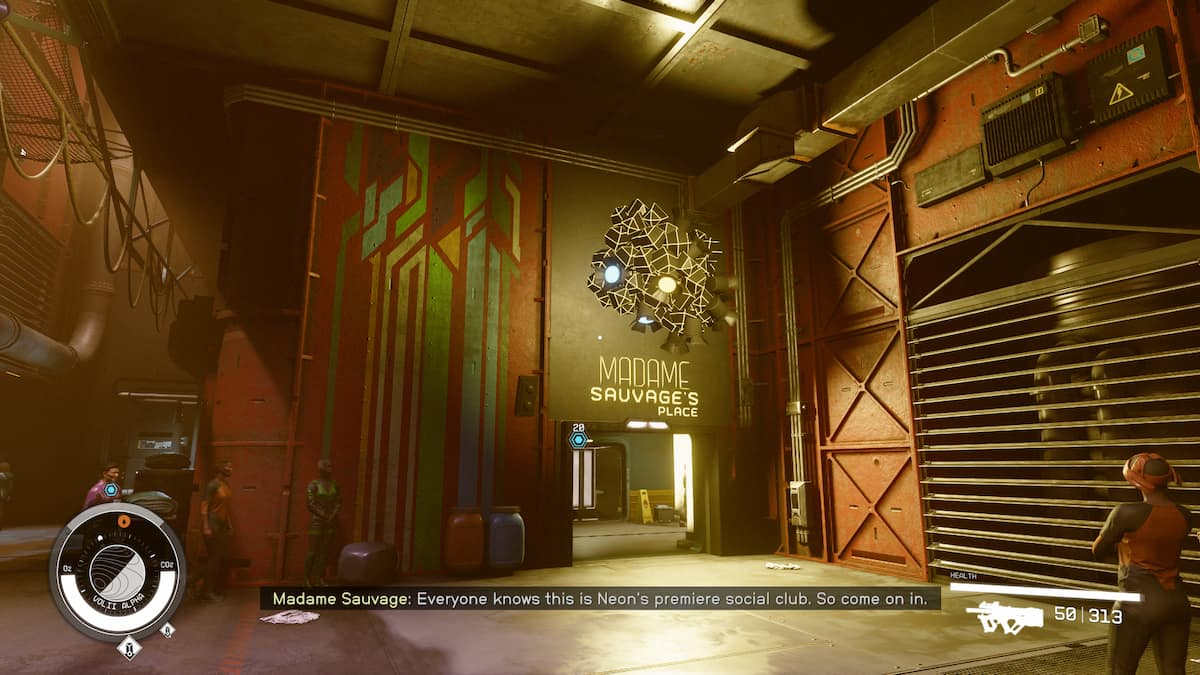
Madame Sauvage's Place is located in the Ebbside of Neon, which you will find as a separate gate along the edges of the main stretch. At Madame Sauvage's Place, head to the upper level, and Estelle will be waiting for you to discuss your next steps.
After speaking with Estelle, you'll have a few options on how you're going to approach Ayumi Komiko and get the pass to sneak into Generdyne Industries. You can either spend a lot of money to bribe her, kill her, or find some incriminating evidence to blackmail her. Now, if you're genuinely trying to play the proper part as a Vanguard agent, you're going to want to avoid killing anyone, so I would suggest either bribing her if you have the money or blackmailing her. Blackmail is the best option, in my opinion, and it isn't hard to do.
How to find incriminating evidence on Ayumi Komiko in Starfield
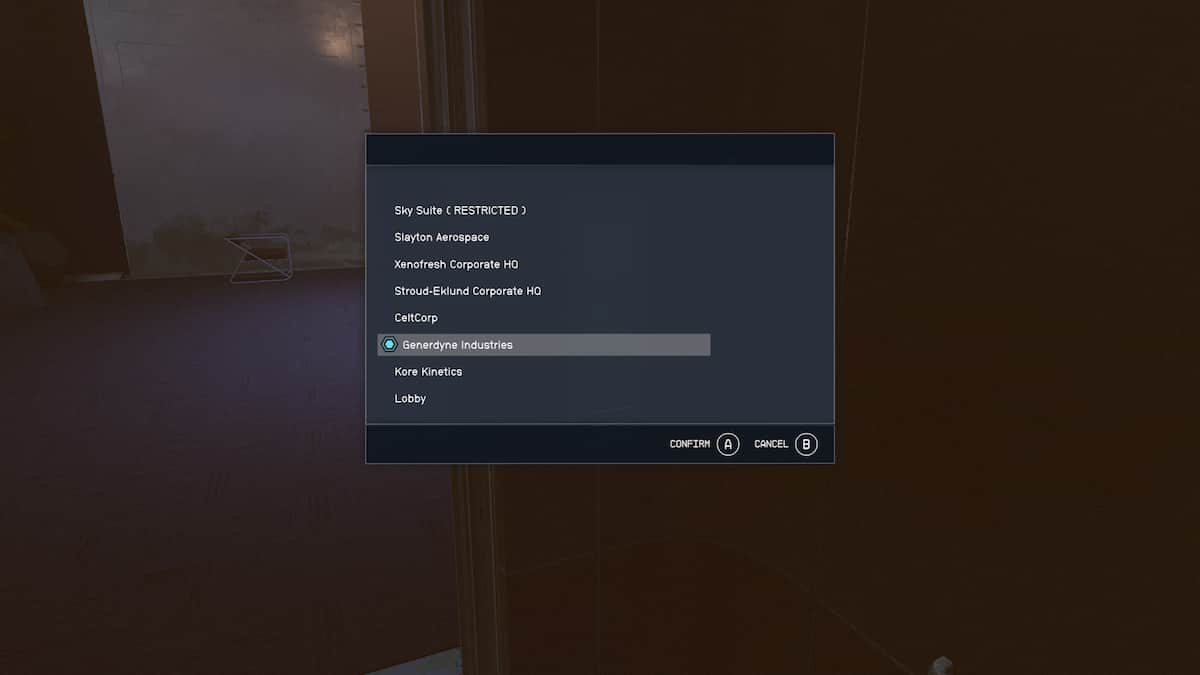

To properly blackmail Komiko, head over to the Trade Towers before speaking to her and use the elevator to go up to the Generdyne Industries Office. Here, you will want to speak to the receptionist, Ji Nashida. All Ji wants is someone to listen to his rant and give him some friendly advice. This will allow you to get the evidence you need more easily, so choose to listen and then use the persuasive dialogue to get him to tell you about Komiko. If you complete the persuasion correctly, he will unlock the safe in the office for you.

With the safe unlocked, head around the corner into the office, where you'll find it mounted on the wall. I would suggest using the switch beside it first to close the blinds and avoid getting caught stealing. Grab the Meeting with Bayu slate from the safe; this is the evidence you will use to blackmail Komiko and a piece of evidence you can turn into the Vanguard.
Related: All Burden of Proof Evidence Locations in Starfield
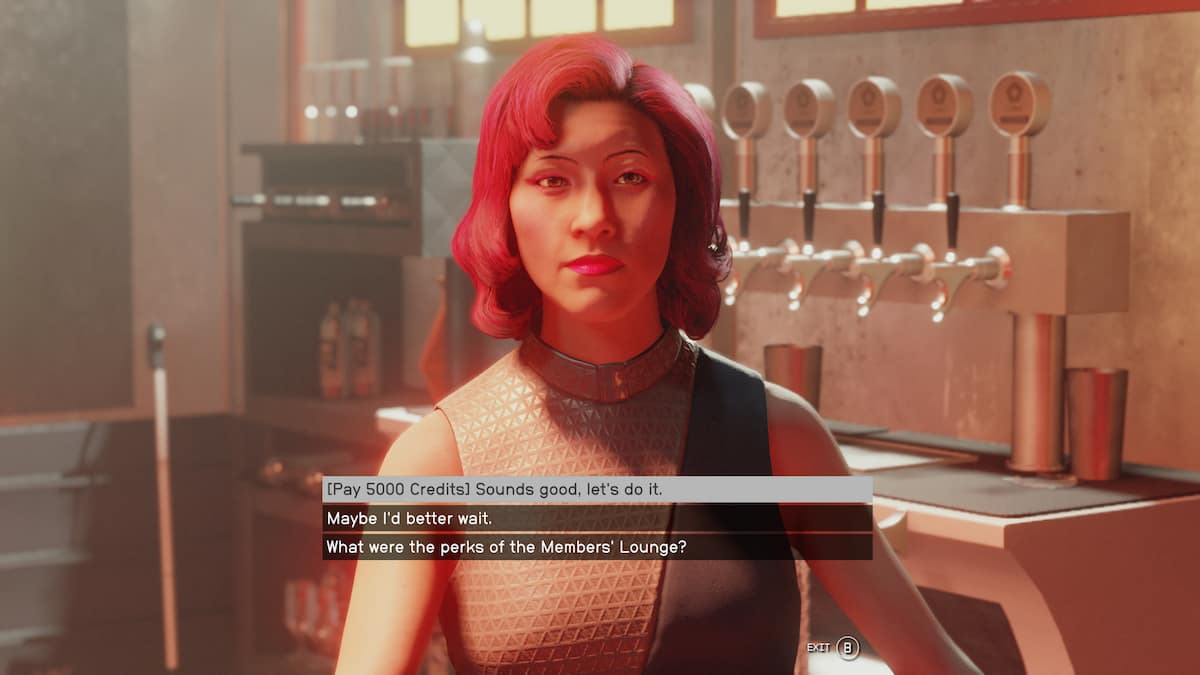
Now that you have the evidence, head to Euphorika and speak to the bartender. You'll have to pay 5,000 credits to get into the private Member's Lounge where Komiko is. So far, I haven't found any way around this, but you should have plenty of credits to spare from the Vanguard and Crimson Fleet payments.
Once inside the Member's Lounge, speak to Komiko and properly blackmail her with the piece of evidence. She'll give you the passkey to enter the Generdyne Industries building. However, if you'd rather not spend the time to get the evidence, you can also head here right away, pay for the membership, and then bribe her with some more credits or simply try to kill her to get the pass.
How to sneak through Generdyne Industries in Starfield
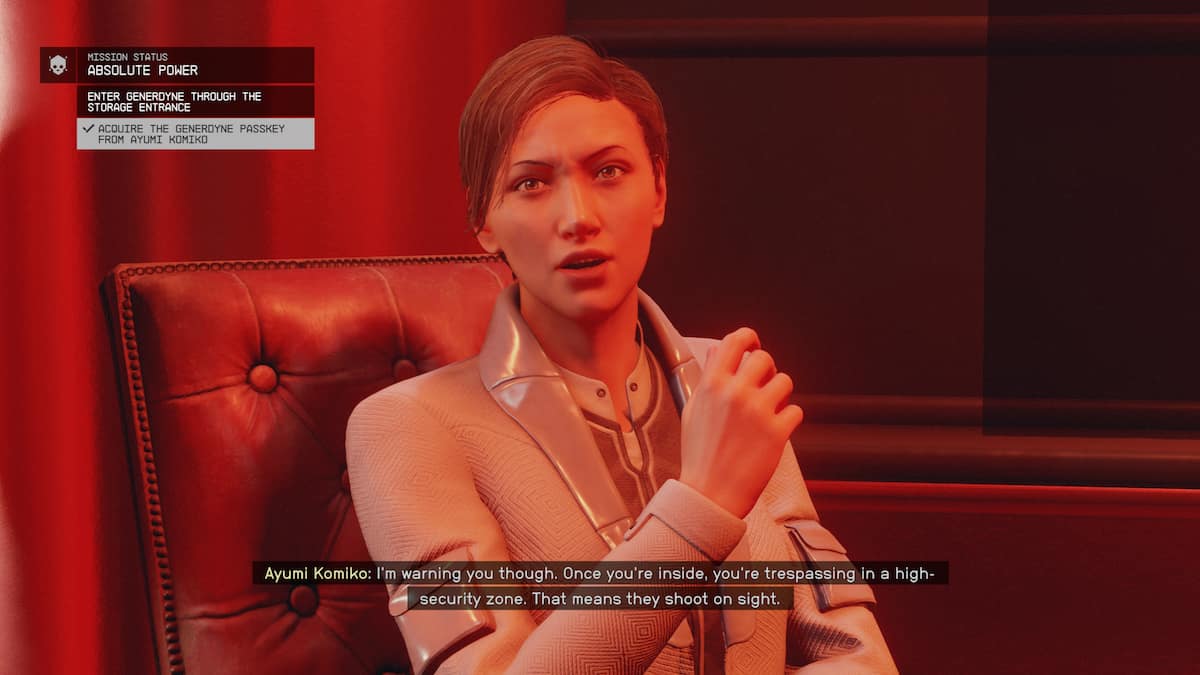
Now that you have the passkey, this is where things get difficult. You need to be extra stealthy to get through the Generdyne building without starting full-on warfare. I would highly recommend investing some skill points into stealth beforehand and saving your game as much as possible to make this much easier. Here are some ways to sneak through more easily:
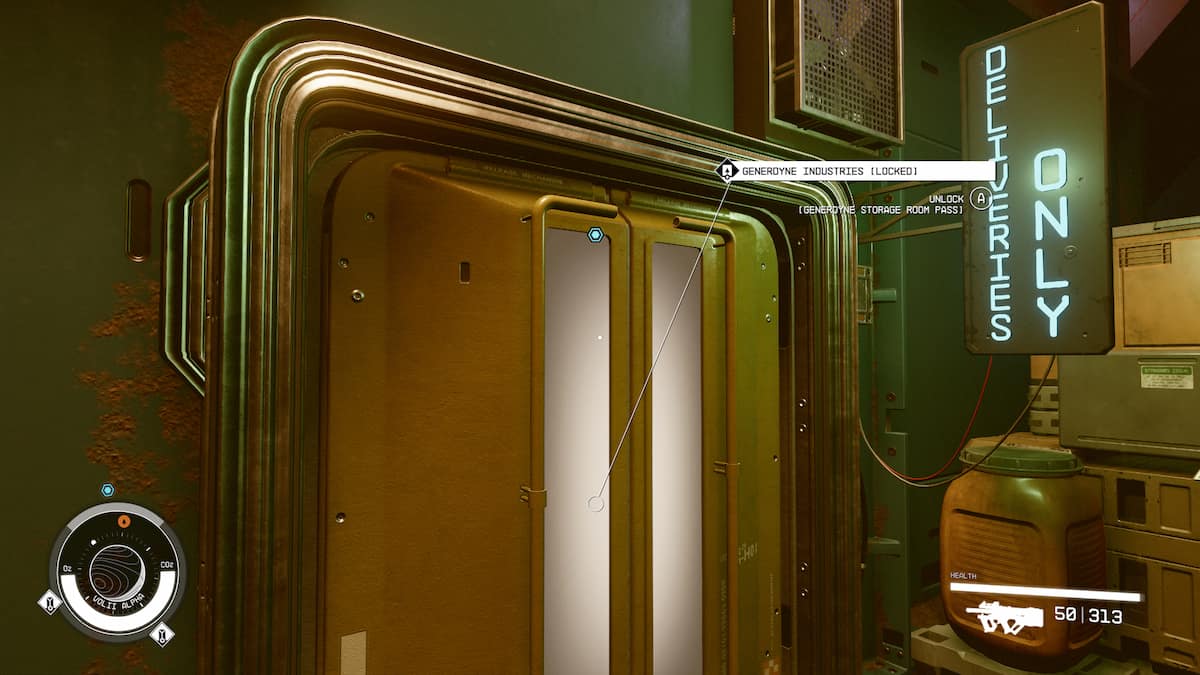
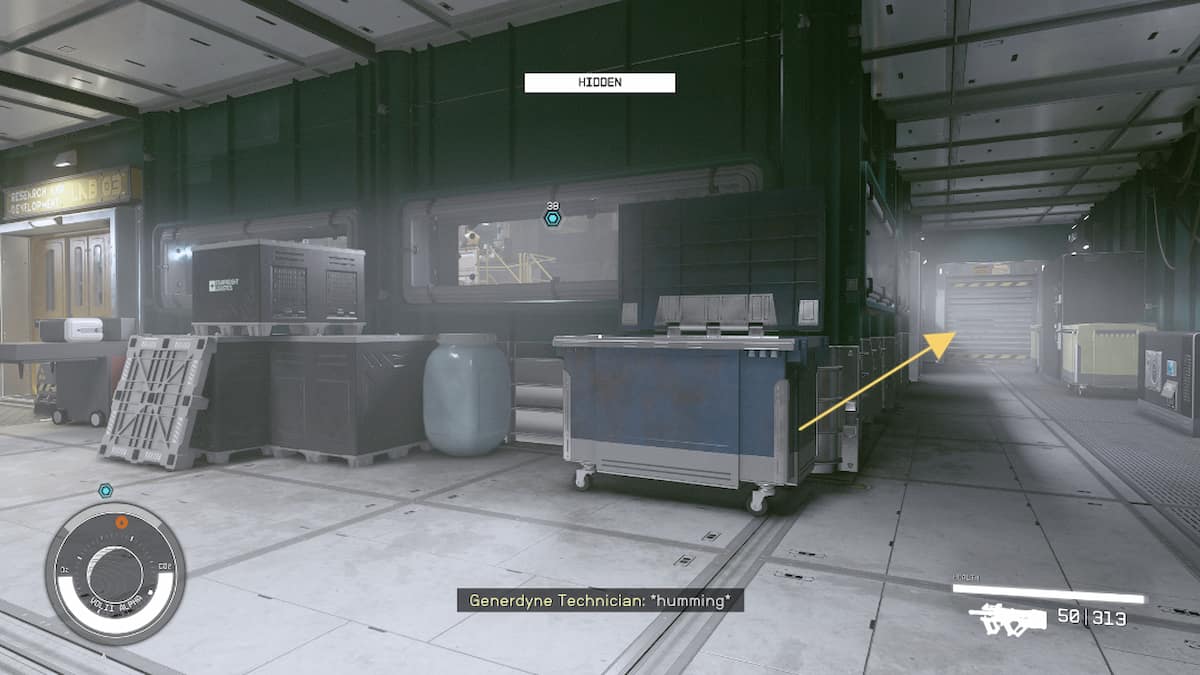
Once you reach the Generdyne Industries building in the Underbelly, head around the right side, where you'll see the 'Deliveries Only' sign. Use your passkey to unlock the door and enter the storage room. You'll need to be sneaking at all times while inside. Right away, you'll see a vent grate that you can open and enter. Follow the vents and continue down the path until you come to some stairs.

Instead of going up the stairs, where you'll easily be seen, take the door on your right and enter the lab room. From here, you'll want to use the consoles in the middle of the room to climb up to the next level through a hole in the ceiling. However, there is a guard who patrols through the upper floor lab, so time it correctly before climbing up.
After climbing up to the next level, you'll want to take the door in the left corner down some stairs. Move through this corridor and head toward another door on your right, past the little cleaning robot. Be sure to time it correctly; the guard will patrol back and forth through here.
Once you reach the door on the right, you'll come to a longer corridor and see a Security Robot. Wait until he turns around the corner, then make for the open hatch in the floor and drop down into the vents. Follow this vent until you reach another hatch. The Security Robot will be patrolling through here, so you'll need to wait for him to turn back around and then open the hatch and climb up.
After you climb up, take the first door beside you, and you'll enter a room with a large computer console. There will be a technician on the console directly in front of you and a guard that patrols from the right side to the middle. Sneak around to the left of the large computer console to stay hidden, wait for the guard to move with his back turned to you, and then continue through the next door slowly.
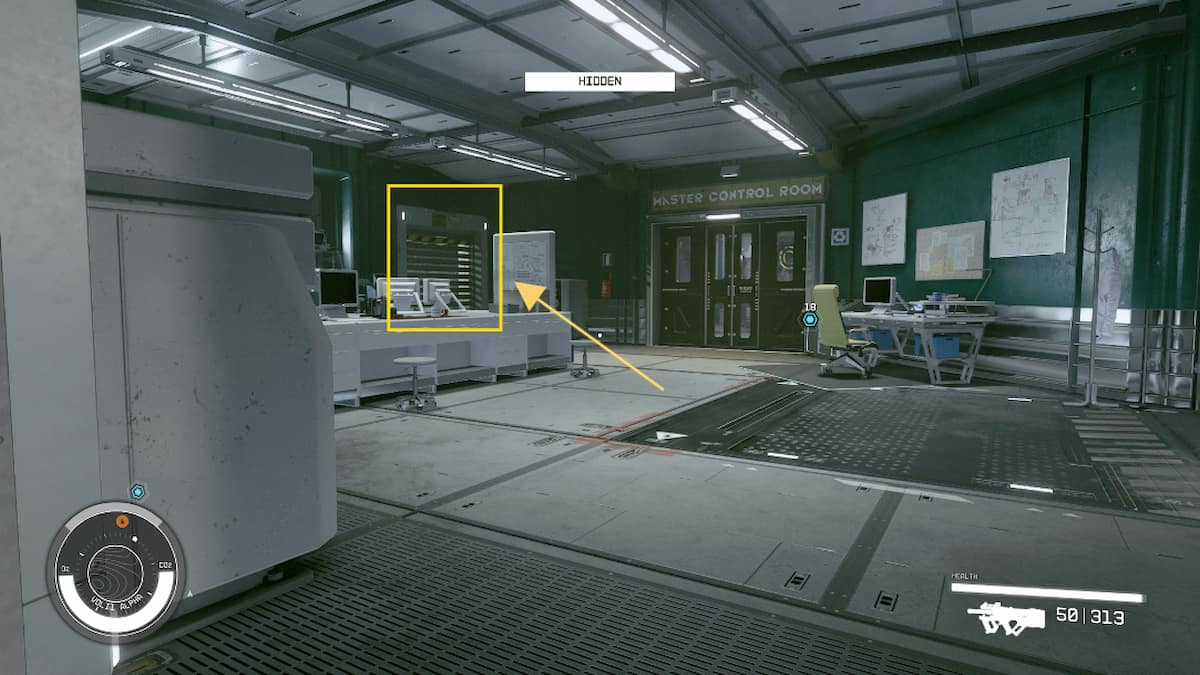
Here, you'll enter another lab where there are many more people. Wait for the guard to turn with his back to you, then sneak around to the back of the computers. You'll find a vent entrance to go inside; follow the path to the other vent exit and wait for the guard to move away. You'll see a door labeled 'Master Control Room,' but instead of entering it, take the vent just to the left of it.
Related: Starfield Character Builder – Tools for Creating Builds
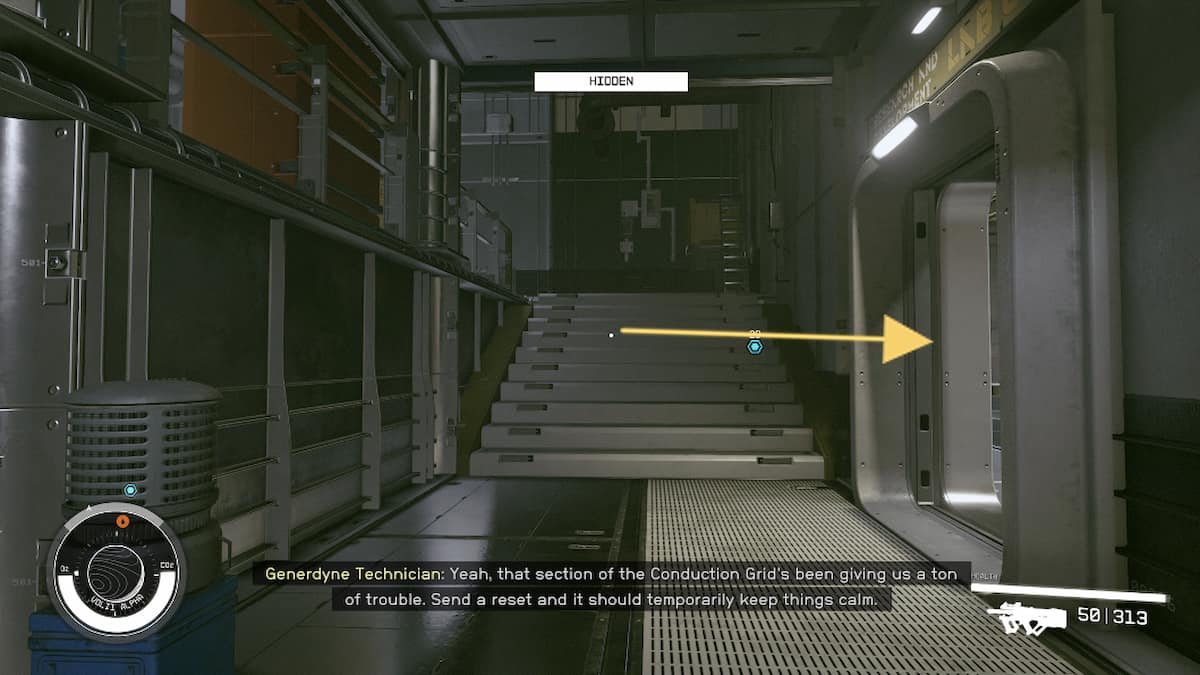
Continue through this vent until you get to an open spot with caution tape labeled on the floor. Make sure the coast is clear and drop down through the opening. Try to stay behind the crates here to avoid being seen. Then, take the door directly to your left to enter the Conduction Grid.
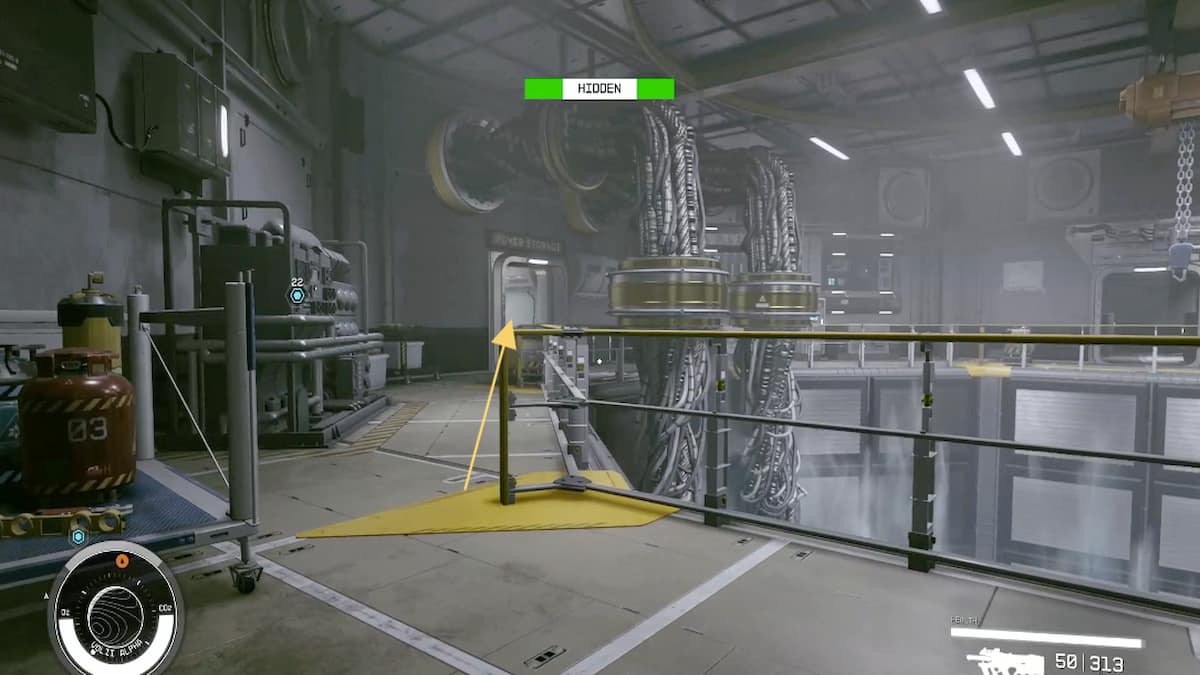

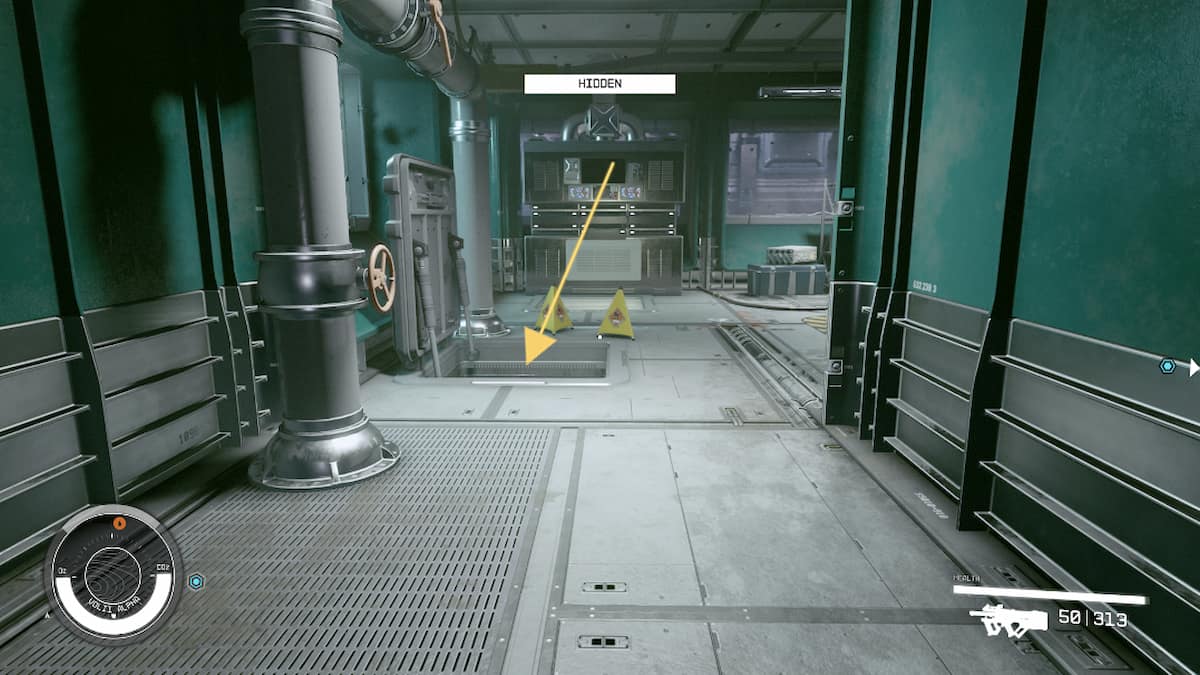
The Conduction Grid is a large open room, so play it slow to get through unseen. Follow the path to the left and enter the door that says "'Power Storage." This will allow you to get on an elevator and head down to the Power Control Room. Use the computer to download the info you need, then continue forward to the stairs and head up.
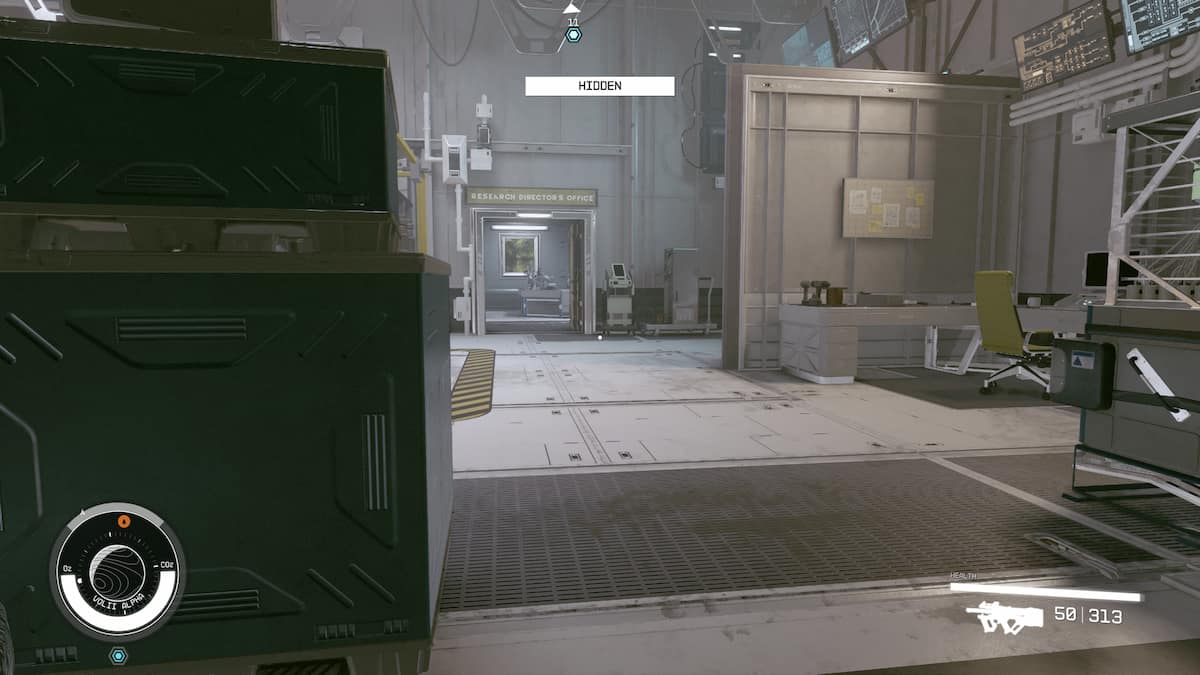
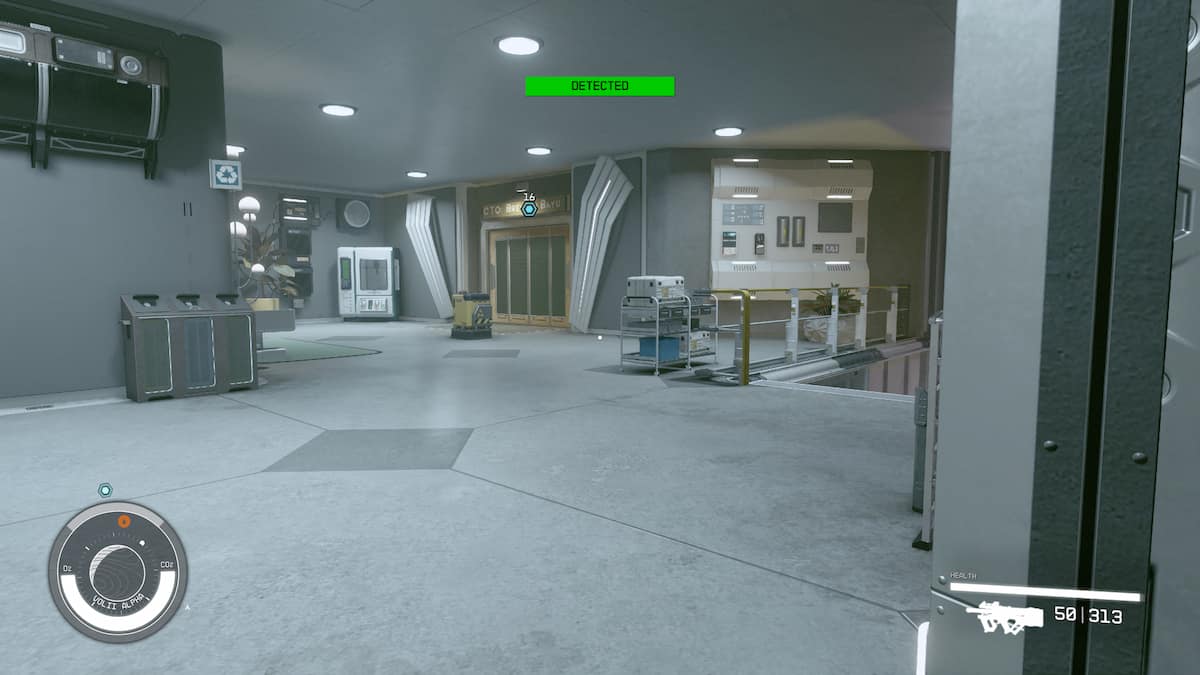
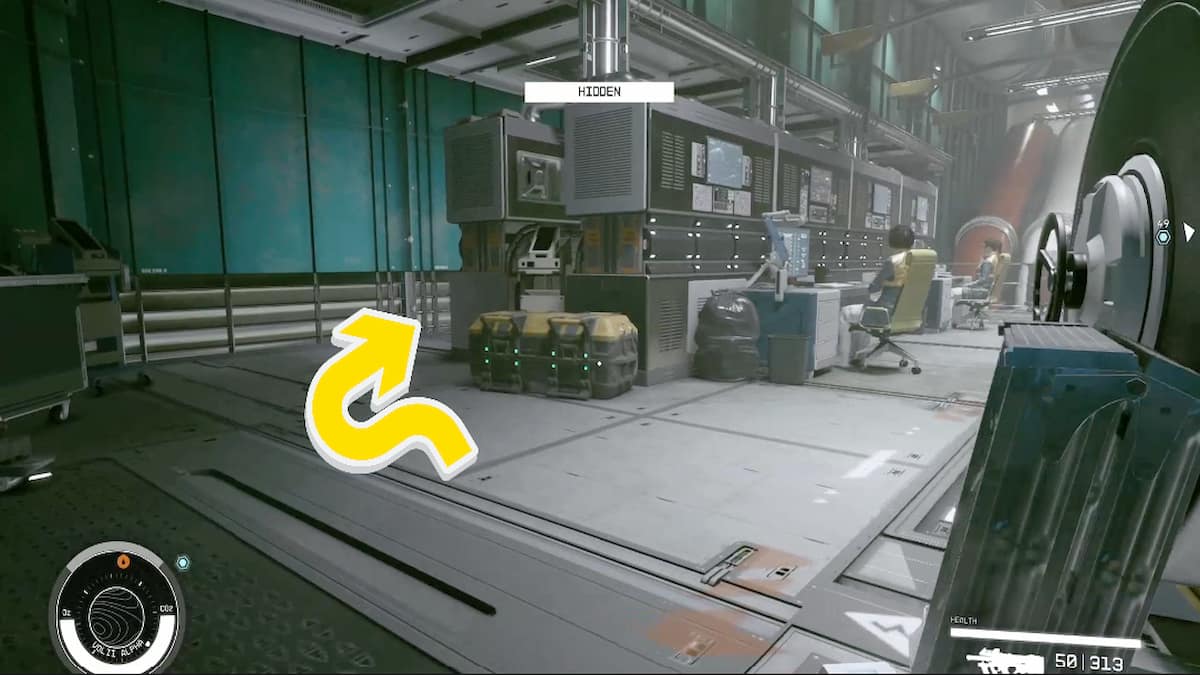
From here, you need to locate Bayu. Instead of going through the main Research and Development lab door, head around to the right side and enter another vent. Follow the vent to the other exit, and you'll see a door to the Research Director's Office. You'll want to sneak across the hall at the right time to avoid patrols and go inside. Inside will be yet another vent you can enter that will lead you all the way to where you'll see Bayu's Office. There will be a little cleaning droid in front of the door; don't worry if he sees you, but do be aware of other patrols. Then, head across the hall and enter the office.
Now that you made it to the office, you're completely in the clear. Speak to Breyson Bayu at his desk, where he'll freely allow you to use his computer and install Estelle's virus. After you're done, head off to the back of the room, where you can use an elevator to return to the lobby quickly. As you're heading through the Astral Lounge to meet back up with Estelle, you'll instead come face-to-face with Benjamin Bayu.
Who should you blame the virus on to Benjamin Bayu in Starfield?
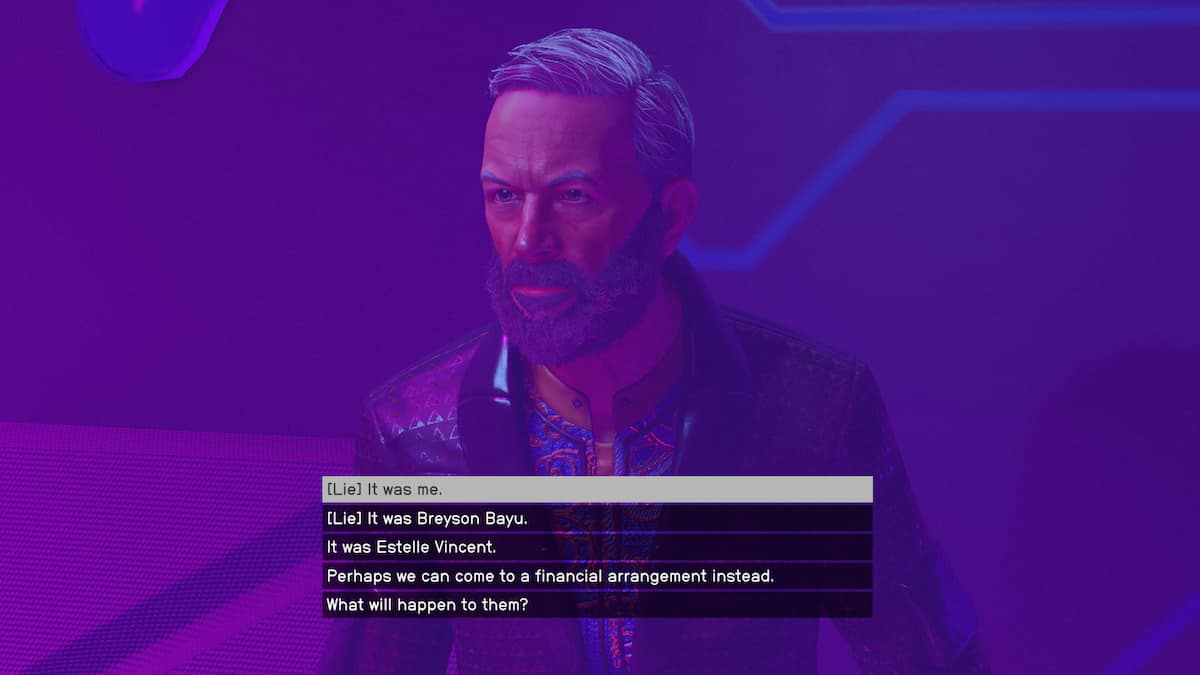
Benjamin is not going to let you get away that easily after installing a virus. However, he is willing to make a deal. You have a choice to blame one person for the virus: Estelle, Breyson, or yourself; depending on your answer, there will be different consequences.
The choice is really up to you; however, I would suggest avoiding giving up Estelle. This will make things look bad for you to the Crimson Fleet and potentially blow your cover. Giving up Breyson will allow you to leave without any trouble but will look bad on you with your companions. Giving up yourself will lead to a bounty on your head in Neon, but you can always pay it off at a Bounty Clearance Kiosk. After giving someone up, you can continue back to Euphorika, where Estelle is waiting.
Should you pay Estelle Vincent in Starfield?
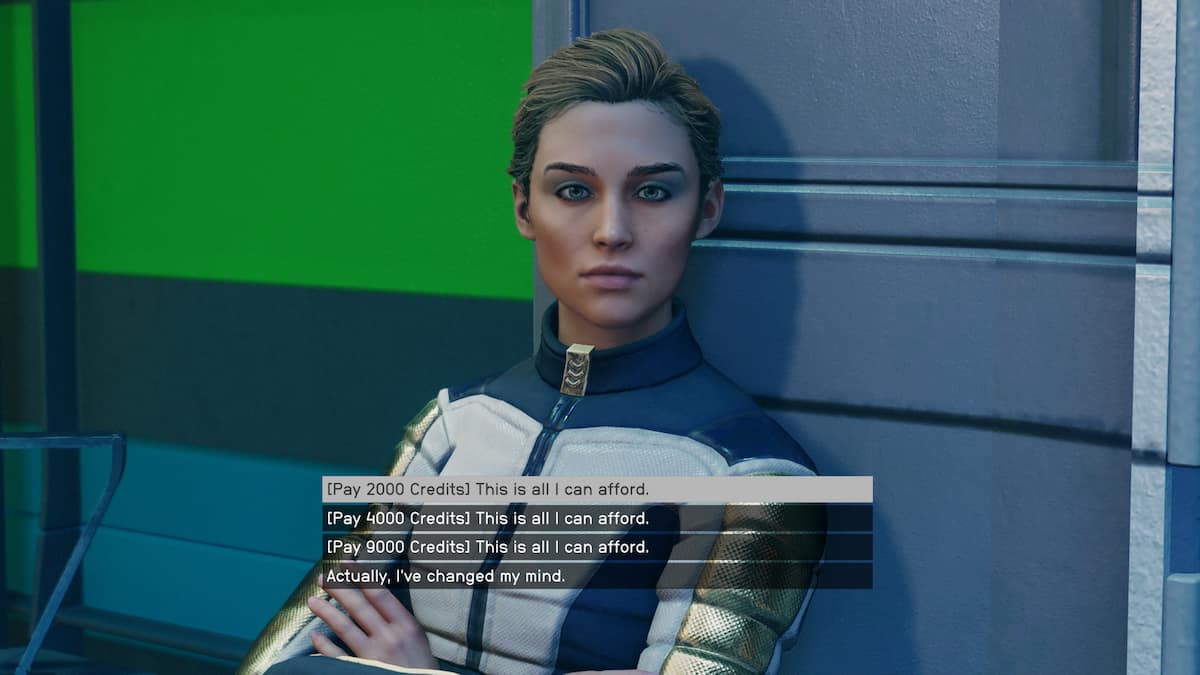
Meeting back up with Estelle can go very different ways, depending on if you decide to sell her out to Bayu. However, if you chose Breyson or yourself, she'll simply be understanding. However, she will ask if you can pay her for her help in Generdyne since her virus didn't work out. This is another choice that is entirely up to you but does affect your relationship with her. Choosing to help her out will look good for you for the Crimson Fleet, so it doesn't hurt to throw in a few credits. She'll be the most pleased with anything 4,000 or more.
Once you finish talking to her, you can head back to The Key to report to Delgado, and you'll officially complete the "Absolute Power" mission. This is probably the most intense stealth mission you'll face with the Fleet, but be prepared for more craziness as you continue.
Looking for more Pro Game Guides Starfield content? Check out our guides on All Starfield Shipyard Locations & Best Ones To Build Your Ship In or How to Steal and Register Ships in Starfield!